The Grand Grimoire – Homebound
Finally finished my custom bound copy of The Grand Grimoire of Cthulhu Mythos Magic! This isn’t an exact match to Chaosium’s printed cover, but let’s call it heavily inspired by the official cover.
This home bound copy includes a cover made from a strange hide (skin?), aged gold foil title and Cthulhu artwork, custom protective corner and cover hardware, hand-sewn laser-printed pages with gilded edges, a ribbon bookmark, and embossed endsheets with matching headbands.
I’m using this as a learning experience so I can make a cool version of Our Terrible Fate when I finish it, and this was by far the most complex bookbinding project I’ve undertaken yet.
Making the Grimoire
Preparing the Text Block
The pages are laser printed and divided into signatures of four sheets (16 pages) each. These signatures are then hand sewn with linen thread. To help keep the printed content aligned despite the tendency of consumer printers to fail at centering content, stitch marks are added to the PDF prior to printing. Once all the signatures are sewn together, the spine is then glued with a flexible glue designed for bookbinding.
- Sewing the first signature of The Grand Grimoire
- Text block sewn and glued
After the signatures are bound together, it’s time to trim them. During my past projects this step was done by hand with a box cutter. For this project, I stepped things up and purchased a larger guillotine cutter. Of course, that is one of the first points at which things took a turn for the worse. Not having used this type of cutter before, I made a couple of mistakes before I got it right. Fortunately, nothing went so badly that I couldn’t correct it, though the end result was slightly smaller pages than originally planned.
The end result of trimming the textblock was good enough that I went ahead and gilded the page edges. I used a metallic acrylic paint designed to work well on paper. I’ve used this process before on past projects, but the cleaner edges produced by my guillotine made this work much better this time around. Next, I debossed some linen cardstock for my endsheets using my Cricut. The endsheets were then folded and attached to the text block, along with a ribbon bookmark, moslin to reinforce the spine, and headbands to match the endsheets.
- Not everything goes smoothly
- Completed text block of the Grand Grimoire
The Cover
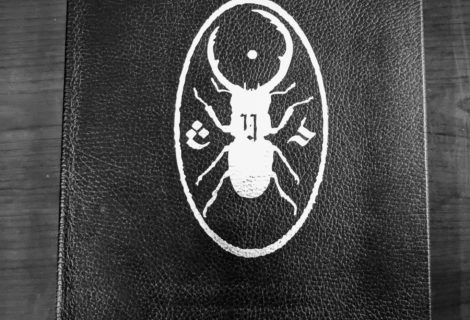
The cover for this project is a bit of a challenge. The artwork on the official hardcover is designed to look like a tome, but not an ordinary one. To begin with, some of the elements aren’t exactly identifiable. There are parts that might be straps, including one that actually covers a portion of the elder sign in the middle of the cover. The elder sign itself is a little different from Chaosium’s usual representation of the symbol. A lot of the stuff on the cover is made to look like metal hardware. And then there is the background of the cover – the material of this tome. It’s unusual to say the least.
I actually started with the cover material – even before the text block – because I knew it was going to be more challenging than my past projects. Trying to approximate the look of the exotic skin from the official book wasn’t going to be as simply as cutting a piece of faux leather. I ended up adapting a couple of techniques I found online to make a heavily textured cover from a combination of butcher paper and acrylic paints. I then glued that to another layer of butcher paper – again using the flexible bookbinding glue.
Then I turned to planning out the other elements of the cover. I wasn’t about to custom order actual metal hardware or take up metalworking, so I would need another material. I also needed to determine which elements I wanted to keep. Using a PDF of the official cover as a reference, I gradually put together a planned version of the cover using vector artwork. This step took the better part of 3-4 days.
- Three days of work designing the cover
- Homemade cover material for the Grand Grimoire
I wrapped the material around the boards I cut from chipboard for the front and back cover and spine and affixed with glue. The double layer of butcher paper is thinner than the faux leather I’ve used for previous projects. It’s not quite as flexible, but I definitely understand why bookbinders prefer working with thinner materials. This material also seems like it will hold up better than expected, but time will tell.
For the foil, I used iron-on gold foil cut out using my Cricut. Ran into some challenges with the title on the spine, but finally got it worked out. I also used some watered down acrylic to “age” the foil and better bring out some of the texture of the foil overlaid on the cover material.
Then I turned my attention to the hardware. This took several days with quite a lot of trial and error. The end process consists of heavyweight (110 lb) black cardstock, which is cut and debossed, painted/drybrushed with metallic gold acrylic, and glued together in layers. Some pieces also include resin and some more acrylic. Even the protective corners use this process, with scoring used to allow for clean wrap-around folds to actually protect the cover. The debossing allowed me to get some good detail and a solid overall look without having to custom order hardware.
- Protective Corners – Folded cardstock prior to acrylics
- Work in progress hardware
The hardware was all attached using glue. I considered applying an additional protective layer over the hardware and cover but ultimately decided against it. Everything seems much more resilient than I originally expected. I had planned to make a strap to gold the book closed with a magnetic clasp – there’s even a magnet embedded in the cover chipboard. Unfortunately, the magnet is not strong enough to work the way I wanted, so I decided to leave it out.
In the end, not everything went as expected, but I learned a lot. I’m also pleased with the end result, and am happy to have added this tome to my shelf.
- Shelf of mythos goodness (darkness)


Recent Comments