Game Features So Far
As I’ve mentioned elsewhere, in the past couple of years I have played two Call of Cthulhu scenarios with my family. The first game, The Haunting, did not go as well as I wanted. The second game, the Peru Prologue to Masks of Nyarlathotep, went far better. I learned a lot from both sessions, and studying those experiences can point to what worked well and what didn’t – pointing to a preliminary list of features for my game.
I’ve also played a fair bit of both Mansions of Madness and Arkham Horror: The Card Game, not to mention numerous other board games. Again, examining what I liked and what I didn’t should help define some more features I may wish to incorporate.
 Differences Between The Haunting and Peru
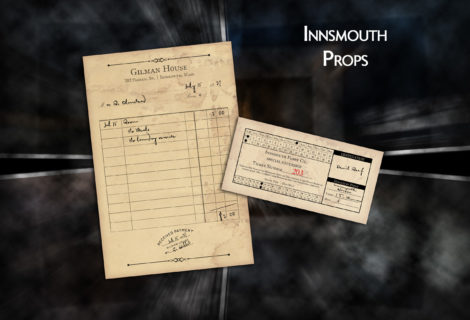
There are a few things I did differently when playing these two scenarios. While The Haunting didn’t go badly, my kids had a difficult time with it. We also didn’t really engage the system that much, and wading through the content of the prop handouts I used consumed a lot of time without a lot of benefit in terms of driving the investigation forward (great for immersion though).
System
When we played The Haunting, we used the Trail of Cthulhu conversion. There were very few dice rolls, and in general we didn’t engage the system except for during character creation. We didn’t quite reach Corbitt before we had to stop, which assuredly would have used the system due to combat. Not sure that would have gone well anyway, since we didn’t use the system much leading up to it.
For Peru, I used a work-in-progress version of the system I’m working now, which is a custom adaptation of Fate Core. There were a few parts of the system we didn’t engage with as much as we probably should have, but that was due more to some mistakes on my part as GM. I should have made the difficulty of rolls known to everyone, which I think would have helped drive the Fate Point economy. (I was leaning on my past experience of using unknown difficulties to help build suspense, but that wasn’t necessary.) I probably called for a couple of rolls I shouldn’t have, since I didn’t have any good ideas for complications from failure. And I should have called for a few more defense from horror rolls when the investigators encountered something strange or horrific.
Overall though, we definitely used the system a lot more in Peru, and it never felt like we had an excessive number of rolls. I had already put together a conversion doc that helped me quickly identify what skills would typically apply. However, even when the players wanted to take some action that wasn’t explicitly covered in the scenario, the Fate system made it easy to quickly identify a skill and mechanic to handle what they wanted to accomplish.
Character Creation
I think one of the differences that had the biggest impact for my group was how we got started with everyone’s characters. Our first time around we created characters from scratch using the ToC rules. This got the adults interested in their characters, but we spent a lot of time on this – and since we didn’t engage the system much, it was largely pointless. The choices of professions and such was interesting, but no one had a clue how the numbers for the skills would be relevant. We ended up spending around two hours on creating characters, whereas if we had spent less time on this we probably could have finished the scenario. More importantly, the kids were completely lost during this part. There were way too many choices for them to pick from, which turned them off from the beginning.
When we played Peru, I converted the pre-generated characters over to my Fate Core implementation and presented them to the players. So three people were choosing between about 8 characters. Since I was using a version of Fate, each investigator had a handful of aspects that provided a quick summary of the character, which made it easy for everyone to see how the investigators were different from one another and make a choice. After the investigation got started, I also had each player come up with a Drive for their investigator – basically a goal or concern they had related to the scenario or the other investigators. We didn’t have much opportunity to actually use those Drives in the scenario, but it allowed a bit of customization without requiring a lot of time.
I’ve though quite a bit about how best to handle creating characters in my game. I like the idea of starting with pre-generated characters for the first scenario or two and then allowing custom characters to be created. I also think providing the option to use pre-generated characters in later scenarios could useful – especially if you have additional players join the group. The option to customize pre-generated characters could also be useful. I want character creation to be quick and simple, but still allow for player choice and customization. When it comes to creating investigators from scratch, I’m also thinking of starting with a limited number of choices and then expanding them over time. This makes it easier to get familiar with the process without being overwhelmed and helps support character creation being quick.
I’ll probably deviate a fair bit from typical Fate Core character creation. The focus on the player characters in cosmic horror is very different from that of vanilla Fate Core, and the likelihood that investigators will die or go insane is usually fairly high in these types of games. I want the players to be invested in their characters, but not feel so attached to them that they are put off when they have to be replaced.
Character Creation Design Goals
- Incorporate pre-generated characters
- Allow pre-generated characters to be customized (Drives, Stunts, Ties)
- Allow creation of new characters
- Quick and simple character creation combined with player choice and customization
- Limited initial character creation options that increase over time
Character creation is one of the areas where I have some developed, but a lot planned conceptually. I’ll create a separate post delving into this in more detail.
Clues
A central element to investigation-based gameplay is the discovery and interpretation of clues. One mythos game that really embraces this idea is Trail of Cthulhu, and it also touches on there being different types of clues. Building on this idea and adding a Fate twist, I handled clues a little differently with Peru than I did in The Haunting. This ended up working to great effect.
When we played The Haunting, I used lots of props, so there were plenty of documents that provided clues to the investigators. While these were great for immersion, they did little to overcome some of the common challenges with investigation games. Without going too much into it here, the players had difficulty parsing through the documents to separate the clues from the fluff, keeping track of the clues they had uncovered, and piecing together clues any sort of helpful way. When we ran Peru, which has far fewer physical documents, the players nevertheless had a far easier time keeping track of clues and figuring things out. They still had to find the clues and interpret them, so the core of this kind of gameplay remained intact without many of the usual challenges. (They even interpreted the clues incorrectly, but were still able to bring about a generally successful conclusion to the scenario.)
 The first thing I did was to give clues a little more of a defined structure. Rather than a document or “the information Mr. Knott told you” being treated as a clue, each piece of relevant information obtained from those sources is a separate, discrete clue. So a document may contain several clues, each of which is written as a short, bite-sized, phrase or sentence. (Each Clue is also an Aspect, which has some other interesting advantages, but more on that elsewhere.)
I then created cards for each Clue, which were given to the players as the investigators uncovered them. I still gave the players documents and other props, which continued to provide immersion, and the players only received the Clue cards once they had read the documents. The Clue cards proved extremely helpful. The players could use them to keep track of and review what they learned and easily differentiate between actual clues and information that was just fluff/detail. I also categorized Clues as either Core (vital to the successful completion of the scenario) or Supporting (helpful or background info, but not indispensable), which is useful when determining how to handle investigator efforts to find those Clues.
Clue Features & Design Goals
- Clues written as Aspects on Cards
- Clue types – Core, Supporting, Floating
- Use props whenever possible for documents, etc.
- Clue and Encounter maps for the Keeper/GM
- Some Clues lead to other scenarios (Fragments, Seeds, Hooks)
Locations

Mock up of Boston board used in The Haunting
One thing I had a lot of fun with when we ran The Haunting was a map of the locations in the scenario. I printed a large 20s-era map of Boston and put it on a bulletin board. I then printed out small collages of images for each place and pinned them to the board, with thin yard tacked between the place and its location on the map. As new locations cam up in play, I added them to the board. Gave everything a nice investigation/conspiracy feel and provided the players with some images to help visualize each location.
However, using this board did have a couple of issues. First, it was rather large. We had to either let it take up one whole side of the table or put it off to the side, which meant the players had to get it and walk to it if they wanted to look at the images or reference the map for any reason. It also meant that any time a new location was added, it took a minute to post it to the board and tie it to its location. Most importantly, using the board meant that putting everything away between sessions either took up a lot more space or a lot more time.
When we played Peru, I took a page from Arkham Horror: TCG and decided to use cards. In that game, each location is represented by a single card. Obviously, this doesn’t take much space, and it has the added benefit of allowing for any size location to be represented in the same way. I made a card for each location that contained its name, an image, and an aspect or two describing the location. I started out with only the starting location in play. As places came to the attention of the investigators during the scenario, I put the cards for those locations into play (assuming they knew enough of the location to actually get there).
In practice, this worked extremely well. The players were provided with an array of options of where to go, and as they gathered Clues and learned more they revealed new locations. Essentially, it provided a visual path to follow. They still had to decide where to go and what to do when they got there, but they always had some idea of where to go to look for more Clues.
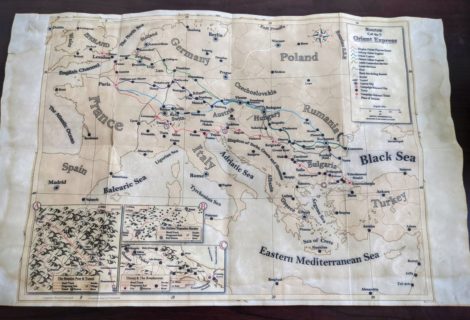
I also created a sort of “board” for the Ruins in Peru. The idea was to echo the process of exploring a location in Mansions of Madness. I showed the players the map of the Ruins and they described what they were doing as they checked them out, but once they went underground, I laid out tiles representing the tunnels under the ruins. They started out with only a couple of tiles branching in two or three directions. As they explored I added more tiles (and also a few Aspects that described the environment). Combined with the creepy sound effects of the Peru module for Syrinscape that I was using, the players were definitely spooked and cautious. It worked fairly well, even with just basic white tiles with no art. The descriptions provided by the Aspects and the process of revealing the map only as they explored it, plus the atmospheric sound effect, was more than sufficient to set the mood and keep them on edge.
There were a few things that need to be refined too. I think providing the players with the map of the ruins worked okay, but I think using cards to represent each area of the ruins could have some benefits. The ruins on the surface were kind of an odd middle ground between the “Encounter” and “Investigation” levels of the game, so I need to look at that some more. When there wasn’t anything of consequence for a couple of tiles in the tunnels, the process of “Which way do you go? That way. Here are more tiles. Now where?” got a little tedious and pointless. Obviously, Mansions of Madness has a lot more structure defined with turns, actions, and such, so I’ll have to work on how to structure this Investigation level of play better. I hadn’t really delved into that yet for this first play through, so all in all it went well. And of course having art for the tiles would be a big improvement. I’m a little concerned that while converting scenarios to this system should be fairly simple for the most part, creating tiles for the Investigation of specific locations could be a challenge and big time sink.
Location Features & Design Goals
- Support quick set up and tear down
- Include image and descriptions/Aspects for each location
- Use cards for locations at most levels of gameplay
- Put location cards into play as players learn of them
- Player pieces can be placed on cards to indication their location during Encounters
- Investigation of locations transitions to tile-based board/map with player pieces
- Additional tiles are added as players explore
- Support additional locations not specified by the scenario, as players desire to visit other places
Non-Player Characters
In games like Call of Cthulhu, keeping track of all the non-player characters the investigators come across can sometimes be a bit of a challenge. This can be such a big issue in larger campaigns that Chaosium’s most recent edition of the epic Masks of Nyarlathotep includes 12 pages of NPC portraits that Keepers can present to players just to help them keep things straight. It’s always a good idea to provide information in more than one form (spoken, text, images, etc.) whenever practical, since different people have an easier time processing and recalling information in different ways.
There aren’t that many NPCs in The Haunting, and only one of them is all that memorable. Since we didn’t reach him during our play through, NPCs weren’t that big of a deal during that game. On the other hand, investigators in Peru will actually get most of their clues from NPCs. There is a lot of repeated interaction with different NPCs, and even one that uses an alias. Again, I used cards for each NPC, including the image from the scenario guide and a couple of descriptive Aspects. Worked really well for helping the players get a quick impression and keep track of everyone.
One thing I need to do differently is with the Aspects for each NPC. I included some information on the cards that the PCs wouldn’t reasonably be aware of at first. I need to focus on basic first impressions and allow for additional details to be added as they are uncovered. Additional details/Aspects could be physically written on the cards, put into play as separate cards, or an alternate version of the card could replace the original. I actually used the last approach for one of the named NPCs in Peru whose “true physical nature” is revealed partway through the scenario.
Character Features & Design Goals
- Use cards for each named NPC or mob
- Include name, image, and descriptions/Aspects for each character
- Allow for additional details of NPCs to be revealed and put into play, beyond what’s on their card initially
Wrap Up
Obviously, there are plenty of other elements to the game – details on the investigators, character advancement, tying scenarios together, etc. – but these are the big ones that made a clear difference in our two games, so they are taking center stage to start out. As I mentioned, I already have more developed or planned for character creation and clues as well, which I’ll hopefully get around to posting in the near future.


Recent Comments